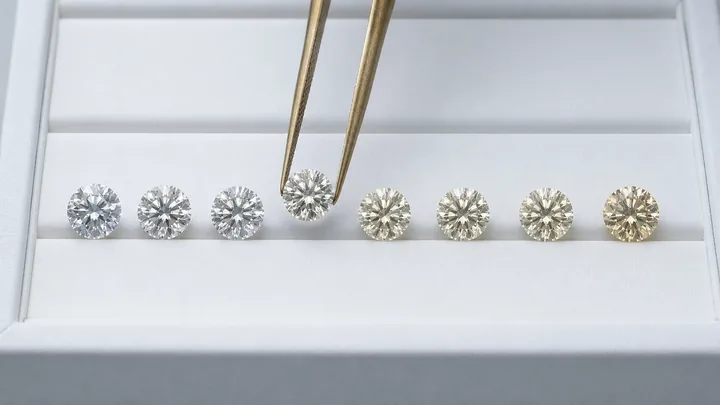
Bottom line up front
Short answer: buy G to H colour with VS2 clarity, or an SI1 you have personally looked at.
- It looks the same. In the great majority of stones that combination is visually identical to the grades above it and costs materially less. Everything above it is rarity nobody at a dinner table will ever see. Everything below it starts to show.
- Two places to move up. Step cuts such as emerald and asscher show everything through their long open facets, so move up on both scales. Past two carats every flaw scales with the stone, so treat VS2 as a floor rather than a target and view the stone before paying.
- Then buy it a step up the chain. That specification is easier to find and more plainly priced at manufacturer, cutting house or dealer level, and it is cheaper there: a counter buys at exactly that level and then roughly doubles the price, about three times at a branded showroom. Premium specification is also about five times more common up there, 52 percent of trade-access stock against 9 percent of retail-held stock.
- A chart is a scale of rarity, not a scale of beauty. The two only track each other part of the way, and they separate exactly where the money starts. The question is not which grade is best, it is the lowest grade at which nobody can tell.
A counter is the better answer when the date will not move, when you would rather judge a case of finished rings on a hand than settle a grade off a chart, or when the label is part of what you want.
Both scales are printed below in full: the GIA colour chart from D to Z with its five groupings, and the GIA clarity chart with all eleven grades from Flawless to I3.
Read them with the rarity point in mind, because it decides how you use them. Every grade above the line at which nobody can tell is money spent on a certificate rather than on a diamond.
The GIA diamond colour chart, D to Z
GIA introduced the D-to-Z scale in 1953. It starts at D deliberately, so that it carried no association with the loose systems it replaced, where the same stone could be called “blue white” by one seller and “AAAA” by another. There are 23 grades, and GIA subdivides them into five groupings.
Grading is not done by holding the stone up to the light. The diamond is viewed table down, under controlled lighting, compared against a set of master stones that each correspond to a letter grade. That is why no counter can replicate a colour grade, and why you should not try.
| Grade | GIA grouping | What it looks like in practice |
|---|---|---|
| D | Colourless | No detectable body colour. The top of the scale, priced accordingly, and indistinguishable from E or F to anyone without master stones. |
| E | Colourless | No body colour visible face-up. A grading distinction from D, not a visible one. |
| F | Colourless | Still reads fully colourless face-up. The last grade in the colourless band and usually the cheapest way into it. |
| G | Near colourless | Reads white in any setting. GIA describes this band as coloration often unseen except by trained graders. The value sweet spot for white metal. |
| H | Near colourless | Reads white face-up. Warmth is detectable only alongside a higher grade, table down, under grading light. |
| I | Near colourless | A faint warmth that most people never notice face-up, and that yellow gold hides completely. |
| J | Near colourless | Warmth becomes findable face-up in larger stones and in white metal. Excellent value in yellow gold. |
| K | Faint | GIA describes this band as coloration still difficult to see by the untrained eye. Visible warmth in white metal at one carat and up. Works in yellow gold. |
| L | Faint | Warmer again. Best suited to yellow gold, antique-style settings and smaller stones. |
| M | Faint | The end of the faint band. Clearly warm in white metal at any meaningful size. |
| N | Very light | GIA notes this band’s coloration can be seen in larger stones by the untrained eye. Tint is apparent in a one carat under white light. |
| O | Very light | Tint apparent face-up. Priced as a distinct commercial band rather than as a letter. |
| P | Very light | Tint apparent in most lighting, in most sizes above half a carat. |
| Q | Very light | Warm face-up. Rarely offered as a centre stone in a white metal setting. |
| R | Very light | The end of the very light band. Openly tinted rather than subtly warm. |
| S | Light | GIA describes this band as colorations that can be seen in many sized stones. Distinctly yellow or brown. |
| T | Light | Distinctly tinted at any size. |
| U | Light | Distinctly tinted. Sold on its warmth rather than in spite of it. |
| V | Light | Openly yellow or brown face-up. |
| W | Light | Openly yellow or brown face-up. |
| X | Light | Strong tint. Approaching the top end of the normal colour range. |
| Y | Light | Strong tint, still inside the normal colour range. |
| Z | Light | The bottom of the D-to-Z scale. Beyond a Z master stone the diamond leaves the normal range and is graded as a fancy colour instead. |
GIA defines each letter as its own narrow range of colour appearance. Outside a grading environment, with master stones beside the diamond under controlled light, adjacent letters cannot be separated by eye, and from about N downwards the practical distinctions are between bands rather than between letters. Treat the third column as description, not as a grading tool.
The GIA diamond clarity chart, Flawless to I3
Clarity describes the inclusions inside a diamond and the blemishes on its surface. GIA’s scale has six categories, some subdivided, for eleven grades in total, and every one of them is defined at 10x magnification. GIA’s standard is that clarity, polish and symmetry grading can only be finalised using a 10x loupe, and a minimum of two graders record their impression of each stone.
The grade is not decided by counting inclusions. GIA weighs five factors: size, number, location, relief and nature. Hold on to “location”. It does more work on this page than any other word.
| Grade | GIA category | What the grade means at 10x magnification | Visible without magnification? |
|---|---|---|---|
| FL | Flawless | No inclusions and no blemishes visible under 10x. | No. Vanishingly rare. Many jewellers never handle one. |
| IF | Internally Flawless | No inclusions, only insignificant blemishes, visible to a skilled grader using 10x. | No. |
| VVS1 | Very, very slightly included | Minute inclusions, extremely difficult to see at 10x. | No. |
| VVS2 | Very, very slightly included | Minute inclusions, very difficult to see at 10x. | No. |
| VS1 | Very slightly included | Minor inclusions, difficult to see at 10x. | No. |
| VS2 | Very slightly included | Minor inclusions, somewhat easy to see at 10x. | Almost never in a brilliant cut. Occasionally findable in a large step cut. |
| SI1 | Slightly included | Noticeable inclusions, easy to see at 10x. | Usually not, but this is the grade you must view. Depends entirely on the individual stone. |
| SI2 | Slightly included | Noticeable inclusions, very easy to see at 10x. | Sometimes yes, particularly above one carat or in a step cut. View before buying. |
| I1 | Included | Obvious inclusions at 10x. | Commonly yes. |
| I2 | Included | Obvious inclusions at 10x. | Yes. |
| I3 | Included | Obvious inclusions at 10x, which may affect transparency, brilliance and durability. | Yes, and appearance is affected, not merely the grade. |
A note on column three, because the attribution matters. GIA publishes its clarity definitions in grouped pairs, not per grade: “VVS1 and VVS2: inclusions so slight they are difficult for a skilled grader”, “VS1 and VS2: inclusions are observed with effort but can be characterized as minor”, “SI1 and SI2: inclusions are noticeable”. Where GIA does separate within a pair it is as a qualifier inside the shared definition, describing VVS1 as extremely difficult and VVS2 as very difficult to see at 10x. Column three splits the pairs out for readability, which is ordinary trade usage, but the split is mine and should not be read as GIA’s wording. GIA also applies the phrase about transparency, brilliance and durability to all three Included grades rather than to I3 alone. The fourth column is my practical read at normal viewing distance: it is not a GIA statement, it is on no report, and it varies stone by stone. GIA does note that most diamonds seen in jewellery stores fall between VS and SI.
The chart is not the decision
Here is where nearly every clarity chart online stops, and where the useful part starts.
Nothing in those tables describes what a diamond looks like on a hand. Every clarity definition GIA publishes is written for a trained grader looking through a 10x loupe. That is the correct way to grade a diamond and the wrong way to buy one, because you are not going to wear it under a loupe and neither is anyone who looks at it.
The trade word for the gap is eye-clean: a diamond whose inclusions cannot be seen with the naked eye. GIA is explicit that this is an industry term and that GIA does not use it. That is worth sitting with. The single most useful property a diamond can have, for the purpose of actually wearing it, appears on no grading report at all.
Which gives you the real question. Not “which grade is best”, but which is the lowest grade at which nobody can tell. In practice, for most stones:
- VS2 is eye-clean. Not by rule, but close enough to it that VS2 is the sensible default when you cannot inspect the stone in person.
- SI1 is frequently eye-clean too, and costs meaningfully less than VS2 at the same colour and weight. It is the best-value grade in the market and the one that requires you to look.
- Above VS1 you are paying for the report. VVS and IF stones are rarer and priced for it. The rarity is real. The visible difference, on a finger, is not.
I cannot give you a percentage for how often an SI1 is eye-clean, and you should distrust anyone who does. Nobody publishes that number, it varies by shape, size and cutter, and a private buyer never sees the stones that were rejected before the tray reached them.
Five things the chart cannot tell you
1. Where the inclusion sits. This is GIA’s own location factor: the closer an inclusion is to the centre of the table, the greater its effect on the grade. The practical version matters more. A dark crystal sitting under the middle of the table is the worst possible place for it, because the table is the window you look through and the facets around it will reflect the inclusion back at you repeatedly. The same inclusion out near the girdle can disappear under the setting entirely. Two stones, same SI1 grade, completely different purchases. One caveat, and it is GIA’s: inclusions near the girdle can make a cut stone more vulnerable to damage, particularly a feather that reaches the surface, so an inclusion at the edge is a visibility win and a durability question at the same time. Ask about both.
2. What kind of inclusion it is. GIA grades relief, meaning the contrast between the inclusion and the diamond around it, and nature, the type of characteristic. A soft white cloud and a black crystal can sit at the same grade and look nothing alike. Dark, high-contrast inclusions are the ones you notice. Faint white ones frequently vanish into the sparkle.
3. The shape of the stone. Brilliant cuts hide inclusions. Their many small facets break up the light and give an inclusion nowhere obvious to sit. Step cuts do the opposite: GIA notes that clarity characteristics are typically easier to see in an emerald cut than in a round brilliant, because long rectangular facets act like open windows. Buy a step cut and move up a clarity grade. Buy a brilliant and you can usually move down one.
4. How big the stone is. Colour and clarity both become more visible as carat weight rises, because there is more diamond for the eye to look through and a larger table to look through it with. GIA’s own note on the very light band is that its coloration can be seen in larger stones by the untrained eye. The practical consequence is that a colour and clarity combination that is invisible at 0.50 ct is not automatically invisible at 2.00 ct, so grade requirements should rise with weight rather than stay fixed. The size guide sets out how much larger a stone actually gets as the weight climbs.
5. What metal it will sit in. Yellow gold masks warmth. It reflects warm light into the stone and gives the eye no colourless reference to compare against, so a J or a K can read perfectly white in it. Platinum and white gold do the opposite. They surround the diamond with something genuinely colourless and expose any warmth by direct comparison. Decide the metal before the colour grade, not after. Choosing yellow gold first can save you two or three colour grades at no visible cost, and that is real money at one carat and up.
Grading is a human judgement, and it has tolerance in it
A grading report is the best information available about a diamond, and it is still a judgement rather than a measurement. GIA’s process is built around exactly that fact: a minimum of two graders record independent colour opinions, further graders are brought in depending on agreement, weight and quality, and the grade is not determined until there is sufficient consensus. That is what a careful system for handling human judgement looks like. It is not what a machine reading looks like.
So treat a grade as a narrow band rather than a point. A stone at the bottom of G and a stone at the top of H are closer to each other than two stones sitting at opposite ends of G, and no report tells you where within the letter your stone falls.
Then there is the second problem, and it is bigger. Laboratories are not equally strict. The clearest documented instance is the scales themselves: GIA declines to issue an SI3 grade, and says so publicly, while some laboratories do issue one. When one laboratory has a grade another refuses to recognise, the letters on the two reports are not interchangeable.
I am not going to hand you a number for how far apart the laboratories run, because nobody publishes a reliable one and every figure circulating in the trade is somebody’s estimate. What follows is a working rule instead. A grade quoted without the name of the laboratory beside it is not information. Comparing a stone graded by one laboratory against a stone graded by another, as though the letters carry identical weight, is one of the most common ways a South African buyer overpays. Get the report number, verify it yourself, and read the GIA verification guide before any deposit changes hands.
What South African stock actually looks like on these scales
The charts describe a scale. They do not describe what is available to buy here, and the difference is stark.
In June 2026 I listed 230 GIA-certified natural diamonds offered by six South African sellers, each recorded with its full specification and price. Defining premium specification as D to G colour and VS2 clarity or better, which is the band this page argues is worth owning, the split was this:
| Inventory type | Stones listed | Reached D to G colour and VS2 or better |
|---|---|---|
| Sellers working with trade access | 93 | 52 percent |
| Retail-held South African stock | 137 | 9 percent |
Roughly a fivefold difference in the odds of finding the specification you came for. This is a comparison of what sits in the two kinds of inventory and nothing more. It says nothing about which is cheaper, and I am not going to use it to argue that, because per-carat figures across those two groups are not comparable.
What it does establish is why the chart above matters when you shop. If you walk into a South African retail case asking for a G VS2, roughly nine stones in a hundred on offer will meet it. The rest of the case is stocked below the line, and the cheapest ticket in it is almost always the lowest grade in it rather than the same diamond for less. Cheap per carat is not cheap per quality.
So what should you actually buy
- Buying unseen, or online. G or H colour, VS2 clarity, and a cut grade of Excellent on a round. VS2 is the grade that protects you when you cannot look.
- Buying in person, and willing to look. H or I colour, SI1 clarity, viewed face-up in normal light with the setting metal already chosen. This is where the value in the market lives.
- Yellow gold setting. Drop two colour grades. I or J, and K is defensible. Spend what you saved on cut.
- Platinum or white gold setting. Hold at G or H. The metal will expose anything warmer.
- Step cut, emerald or asscher. Move up: VS1 rather than VS2, and G rather than H. Open facets show both colour and inclusions.
- Two carats and above. Everything gets more visible. Treat VS2 as the floor rather than the target, and view the stone.
- Never. I1 and below as a centre stone, and any grade at all from a laboratory whose report you cannot pull up yourself.
Run the rest of the pre-purchase questions from the diamond buying checklist, and if a term on a quote is unfamiliar, the glossary defines it.
The chart tells you the spec. Price tells you the seller
Once you have settled on a specification, the chart has done its job and it cannot help you further. Two sellers can quote you the same genuine one carat G VS2, on real reports, tens of thousands of rand apart. Nothing in the grading distinguishes them.
The figure that does is the per-carat price, and the useful thing about it is who will say it out loud. A seller operating at trade level will quote you a per-carat number and let you check it. A seller who will not put a number to a specification, and prefers to discuss monthly instalments or what suits your budget, has told you where the margin is. Here is a number to hold a seller to, derived from the published list so you can redo it yourself. The Rapaport round list of 20 March 2026 prices G/VS1 at 1.00 to 1.49 carats at $5,400 per carat. One carat of that, less a dealer discount off list, converted at R16.50 to the dollar and grossed up by 15 percent VAT, works out at roughly R72,000 to R92,000 for a loose stone, with about R82,000 at 20 percent off list. Set against that, my July 2026 listing work, 73 rows across 18 sellers with 71 prices among them, put a finished one carat ring at a premium South African showroom at R105,000 to R428,000, setting included, off three listings of three different specifications. Same letters on the chart. A bare stone against a finished ring, and a different question entirely.
So the search that matters is not for a shop, it is for a number. Sellers who publish what a carat costs are the ones the price question surfaces, and it is worth spending an evening on before you spend anything else. Start with what a carat actually costs in South Africa, then check any quote you receive against the South African diamond price index and the working figures on the one carat page.
Checks you run yourself
- Get the report number in writing before any deposit, and verify it at gia.edu/report-check on your own device.
- Read the plotting diagram, not just the grade. It maps where the inclusions sit. One drawn under the centre of the table is a different stone from one drawn at the girdle, at the same grade.
- View the stone face-up at arm’s length before anyone hands you a loupe, then loupe it. That order tells you whether it is eye-clean, the only clarity question that changes how it looks.
- Choose the metal first, then set the colour grade against it.
- Compare two stones one grade apart, unlabelled, at the same weight. Most people cannot pick the higher one, and the ones who cannot have just saved themselves real money.
- Ask which laboratory graded it, every time, and treat an unfamiliar laboratory’s letters as a different currency.
- Ask for the per-carat price on the loose stone, separated from the setting, before anything else.
Sources and references
- Clarity scale, definitions and the five grading factors: GIA on diamond clarity and Seven Things You Need to Know About Diamond Clarity, which is also where GIA’s eye-clean and SI3 statements come from.
- D-to-Z colour scale, groupings and grading method: GIA on diamond colour, Diamond Color Chart: The Official GIA Color Scale and The GIA Guide to Diamond Color.
- Grading procedure and the two-grader consensus: GIA colour grading Q&A and GIA clarity grading Q&A.
- Report verification: GIA Report Check.
- My June 2026 inventory study: 230 GIA-certified natural diamonds listed by six South African sellers, each recorded with specification and price, collected 26 June 2026.
- My July 2026 price study: 73 listings across 18 sellers, of which 17 are South African and one is an international online retailer, 71 of the rows carrying a price. Published as bands only. Method in the price index.
- Rapaport round brilliant price list, 20 March 2026: the published asking-price benchmark the loose-stone figures above are derived from, at $5,400 per carat for G/VS1 in the 1.00 to 1.49 carat bracket.
What I do not know, and will not guess at: how often a given SI1 turns out to be eye-clean, and how far apart the grading laboratories actually run. Both would need a controlled sample nobody has published. For how I research and correct these pages, see the editorial policy.
See also
- Diamond price per carat South Africa. What the specification on this page actually costs
- South African diamond price index. The bands and the method behind them
- GIA certified diamonds South Africa. Verifying the report before you pay
- Diamond size guide South Africa. Why carat weight is not size, and why grade requirements rise with it
- Diamond buying checklist. The questions to ask before any appointment